Collaborator Tool, Directory
Consider the following possibility:
I'm a researcher looking for an available student assistant who's interested in Healthcare or Bioinformatics research to help me with a project.
Innovators are going to need innovators if they ever want to build a better tomorrow. As the connecting force of Boston University, it's now possible for the Center for Computing & Data Science to provide such a listing with the CDS theme.
The Collaborator Tool is a combination of:
- an option to designate any Profile as a Collaborator, and…
- a preset for a BU Filtering page template, listing only the aforementioned Collaborator-designated Profiles.
Both of these are initiated, set up and managed by the WordPress administrator of the CDS theme.
Add a Collaborator Affiliation
For a profile post to be designated a Collaborator, the option, or Taxonomy term, needs to be created.
These steps are only necessary if a "Collaborator" Affiliation term hasn't already been created.
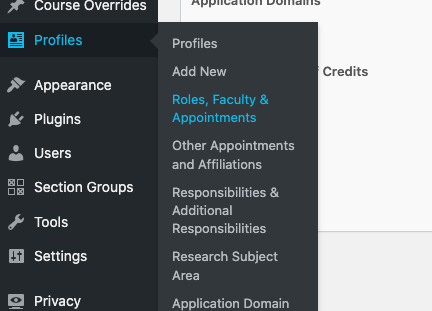
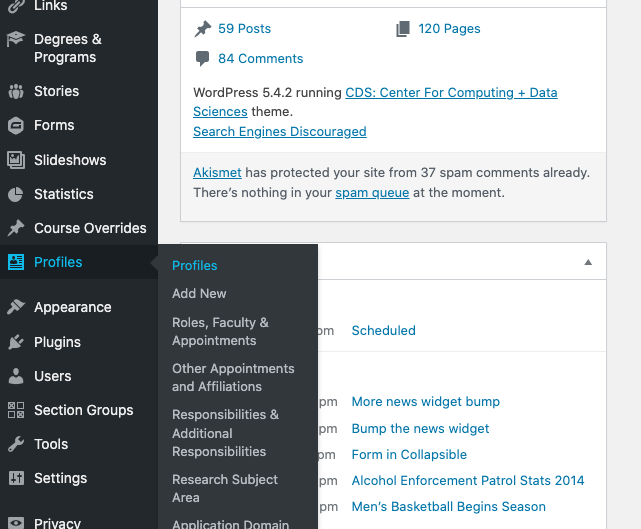
2. Within the "Profiles" sidebar tab to the left: Click on "Roles, Faculty & Appointments". Doing this will take you to the Roles, Faculty & Appointments Taxonomy term manager.
3. Under the Add New Roles, Faculty & Appointment section, type "Collaborator" within the field labeled "Name".
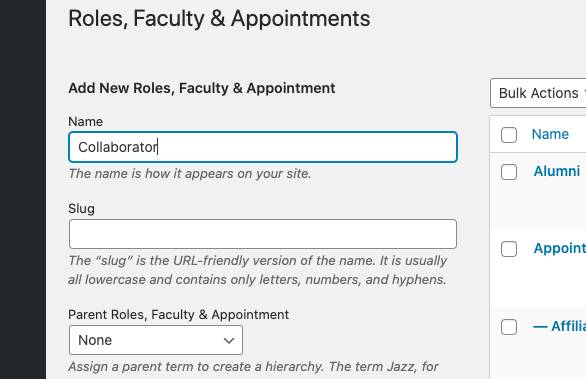
4. For the Slug (a unique identifying part of web information), type in "collaborator" with no spaces.

5. Ensure that the "Parent Affiliation" drop-down is set to the "None" option.
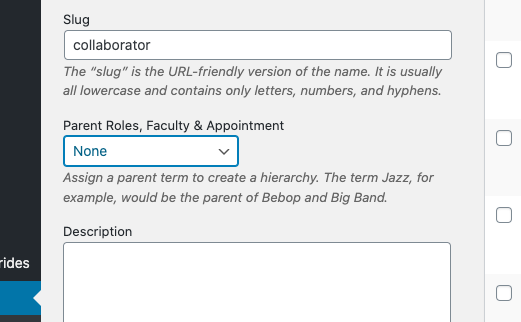
6. Leave the Description field untouched.
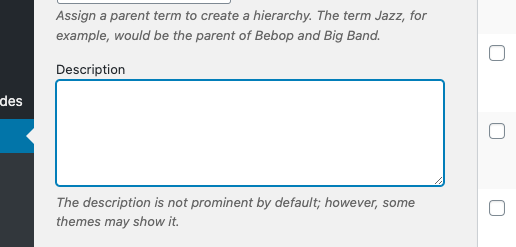
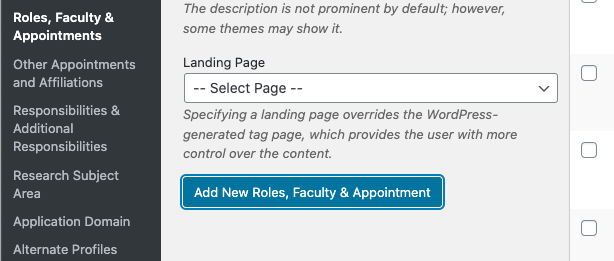
7. Verify that the Landing Page drop-down is left to the "-- Select Page --" option.
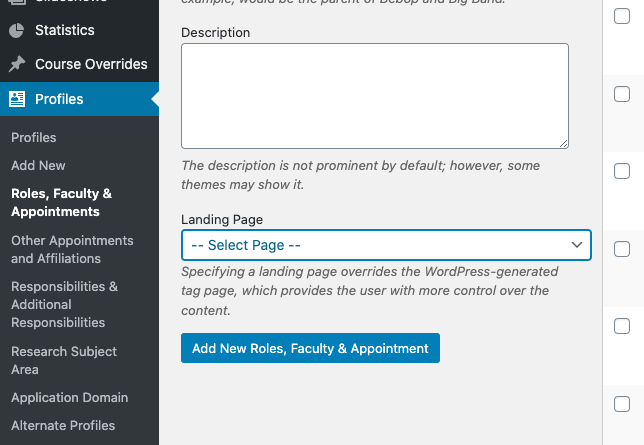
8. Click the "Add New Roles, Faculty & Appointment" button at the end.
Congrats! You've set up the Collaborator Affiliation term. With this set, any Profile post can now be designated as a Collaborator.
This process is also helpful for adding more designations for Profile posts (i.e. "Student" term).
Toggling a Profile as a Collaborator
With the preceding Affiliation option included, any individual profile now can be designated as an available collaborator:
2. Within the sidebar to the left side: Click either the "Profiles" link, or Click on the "Profiles" link within its submenu. Doing this will take you to the Profile post manager.
3. Quick edit any desired relevant Profile post that is to be designated a Collaborator. In this example, we're selecting a Profile named "Ellen Bradley". Click on "Quick Edit": Doing this will expand the posts most immediate options.
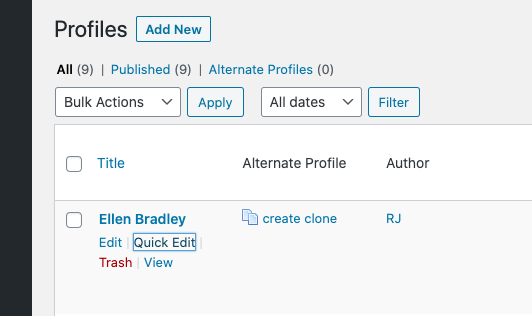
4. Under the “Roles Faculty & Appointments section of your Profile post: Check the "Collaborator" option.

5. Click on Update to refresh the new designation of Collaborator on the Profile post in question.

Making a Collaborator Listing
With select profiles designated Collaborator, it's time to set up a page collecting them. This is done with a BU Filtering page template.
2. Hover over “Pages” and click “Add New”.

3. Enter a title for the Collaborator Directory page. In this example, we're using "Collaborator Directory".

4. Under the "Page Template" section: select the "BU Filtering" option from the provided drop-down.

5. Click on Publish. Combined with the previous step, doing this refreshes the page to include BU Filtering options for adjustment.

6. After the page reloads, look for the new BU Filtering section. Within it: Select the "Profiles" option within the "Post Type" sub-section drop-down. Doing this tells BU Filtering to only gather and list profile posts from across the site.

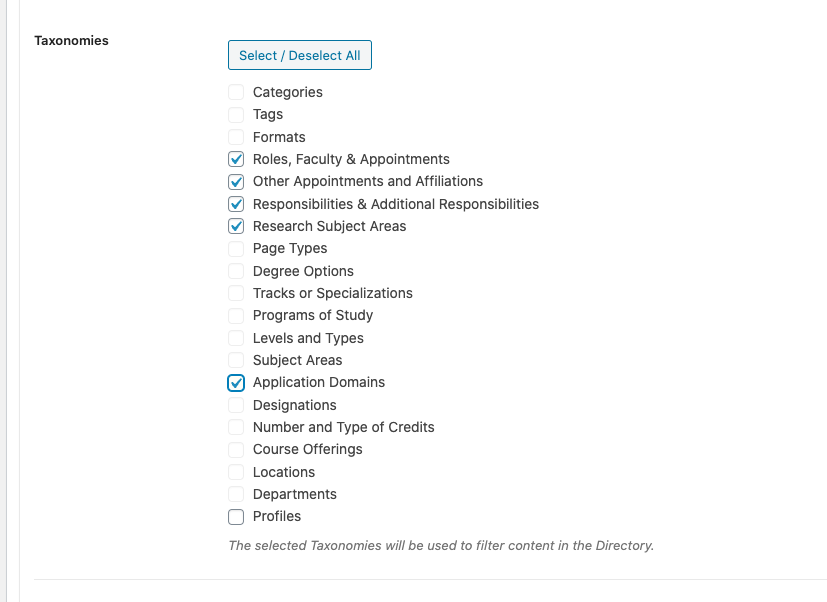
7. Within the "Taxonomies" sub-section listing, ensure that all available checkboxes options are checked — except Profiles. Checking these boxes allows users to access filters through the results.
8. Within the "Template" section: select the "Advanced" option (visually nested under "Profiles") from the provided drop-down. Doing this provides a designed, optimal layout for every individual.

9. Ensure that the "Show Layout Toggle" checkbox is checked. Doing so, provides users the option to view all entries either in a top-down list view, or with a more economical side-by-side top-down grid view.

10. For the "Grid View Results Per Page" drop-down option: select an appropriate number of entries to list from the provided drop-down. In this example, we're selecting 50. Similarly, for the "List View Results Per Page" drop-down select an appropriate number of entries to list from

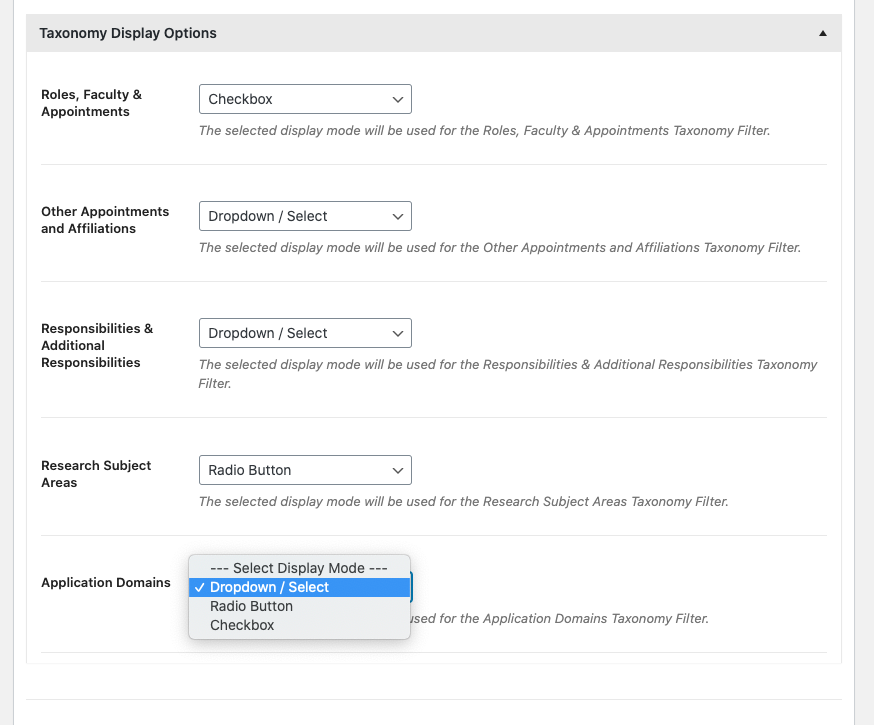
11. In the final section, “Taxonomy Display Options”: select the appropriate format of option selection for each taxonomy from the drop-downs.
The formatting can be either Checkboxes, Radio options, or Drop-downs. Be mindful of what format is appropriate for each taxonomy. Checkboxes allow for the most extensive control: being able to select multiple options. Radio options and the Drop-downs are limited to a single option.
It's best to leave the "Directory URL / Location Options" alone.
12. From the "Filtering Customizations" section, select the "Collaborator" option from the provided drop-down. This crucial step ensures that your BU Filtering page template will only gather and display collaborator-tagged Profile posts.

13. Save your choices by selecting the Update button for this page.

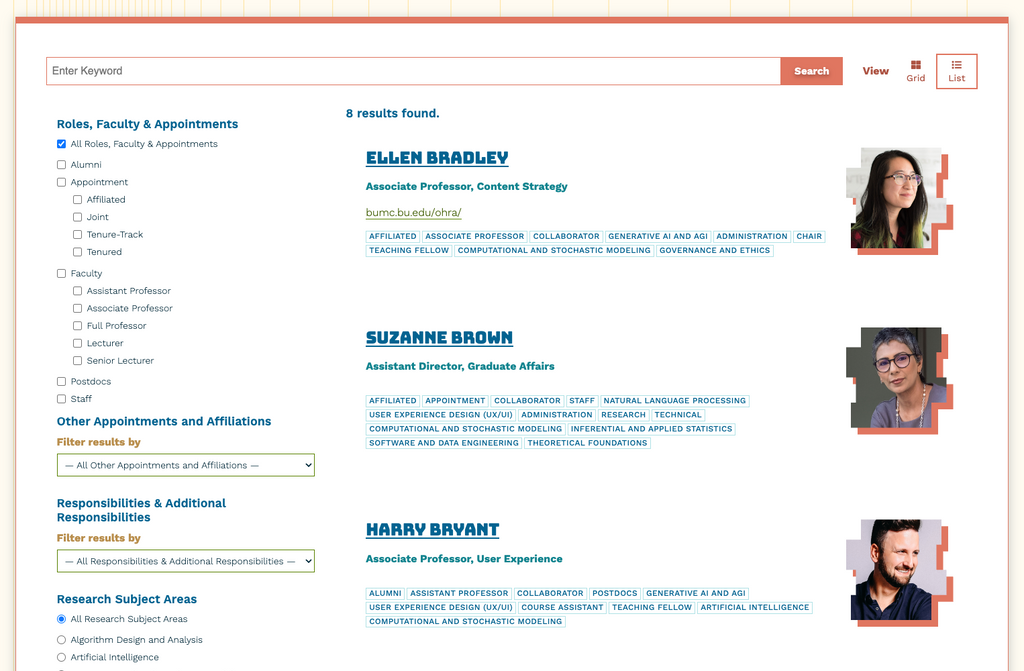
14. Following a page reload, click on "View Page" to observe your newly created Collaborator Directory.

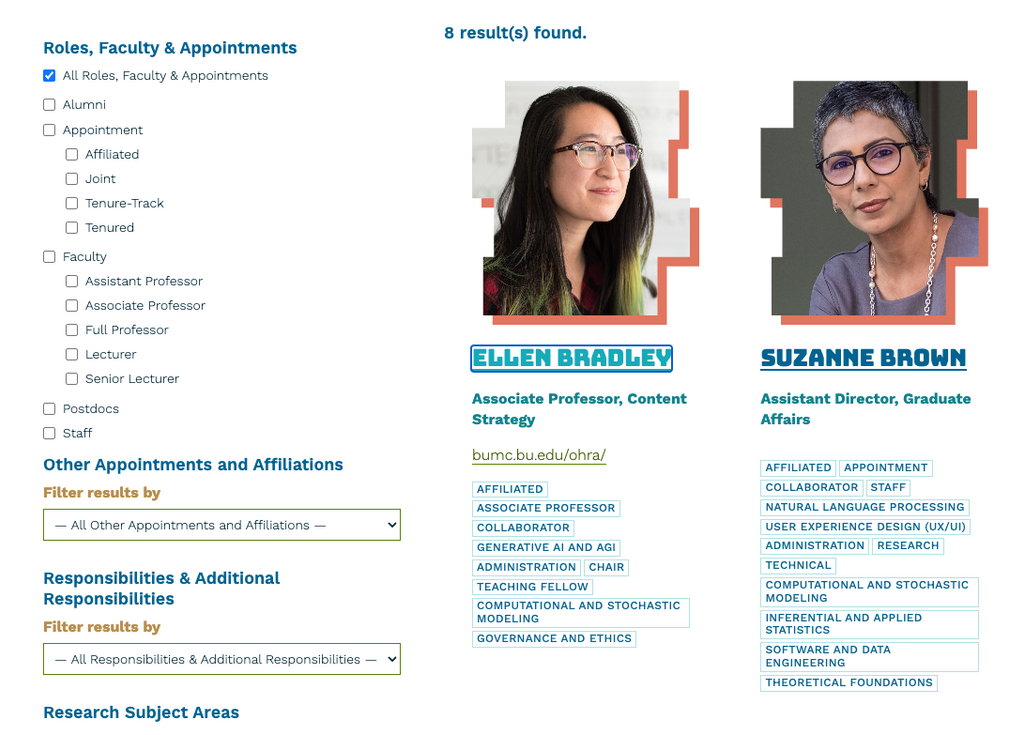
15. On the newly-generated page, the View options in the top-right corner allow users to adjust the layout of all entries. Grid is recommended and optimal.

16. To the left of view options is the search field, in the event a visitor is looking for a specific person.

17. Users can view a Collaborator Profile post by clicking an entry's name. Clicking any of the sidebar taxonomy options refreshes the page and results for users.
*More information about the Roles, Faculty & Appointments taxonomy exists in the introductory explainer for Stories, a Custom Post Type.